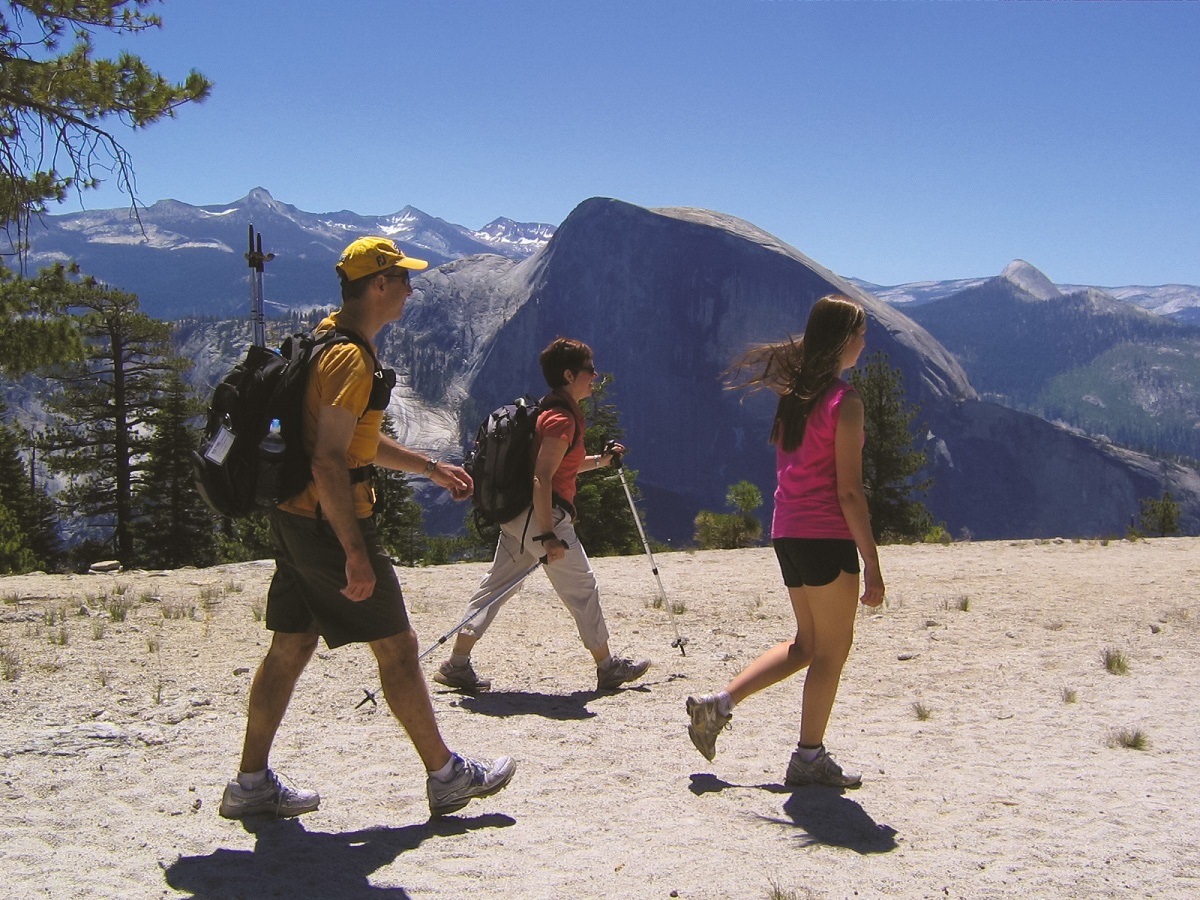
Your Yosemite day hike packing list should include essentials like water, food, seasonal clothing and footwear, weather protection, and emergency supplies. Having the right gear will keep you safe and comfortable on the trail so you can be fully in the moment, enjoying the wonder and beauty of the park. Whether you’re a first-time hiker or an expert wayfarer, preparation is key to a successful day on the trail. That’s why we created this guide to help you know what to bring, what to leave, and what to expect when taking a day hike in Yosemite.

Yosemite Hiking Essentials: Quick Packing List
Use this list to quickly identify essentials and nice-to-haves when packing for your adventure.
| Must-Have Essentials | Safety & Emergency | Suggested & Nice To Have |
| Water or hydration system Snacks and food Hiking shoes or boots Layers Sun and bug protection Map or other offline navigation Backpack | First aid kit Headlamp Whistle | Trekking poles Water shoes Camera Binoculars |
Packing Essentials: What to Bring on a Day Hike in Yosemite
These are the non-negotiables you need to pack. This gear helps you stay hydrated, fueled, and oriented on the trail. Start here before adding optional or comfort items.
Hydration: Water Rule of Thumb
No matter the trail length or season, water is the most important item to pack. Elevation gain, sun exposure, and dry mountain air can increase dehydration risk faster than many hikers expect. Follow these rules of thumb when deciding how much to bring:
- Short, easy hikes: At least 32 oz per adult for short, easy hikes.
- Moderate hikes: Plan for about 1 quart every 2 hours on the trail.
- All-day hikes: Bring around 3 liters per person, more in hot or exposed conditions.
Wondering whether you should use a water bottle or a reservoir? It’s up to personal preference, and hikers should choose the option that encourages them to drink regularly rather than rationing. Here’s how they compare:
- Hydration reservoirs fit inside a backpack, hold larger volumes, and make it easier to sip consistently while moving.
- Water bottles are simple, durable, and make it easy to track water consumption throughout the day. Some even have built-in filters for refilling when natural water sources are available.
Seasonal Water Availability
Natural water sources in Yosemite change throughout the year. During spring and early summer, runoff may create flowing streams, while fall and winter often bring dry trails with limited refill options. Always assume you’ll need to carry all the water you require unless you’ve confirmed reliable sources along your route.
Quick Tip: Drinking extra water the day before a longer hike gives you a head start on hydration and can make the hike more comfortable overall.
Food & Calories
Elevation gain and uneven terrain can increase calorie burn quickly, so having trail-ready snacks on hand is important for sustaining energy and focus. Use these guidelines when packing food:
- Short hikes: Bring energy-dense, easy-to-eat snacks such as trail mix, granola bars, jerky, or dried fruit.
- Longer or more strenuous hikes: Plan for 200–300 calories per hour on the trail.
- All-day hikes: Pack a light lunch that holds up in changing temperatures.
Quick Tip: Choose foods that won’t melt, spoil, or become unappetizing in heat or cold. For example, if packing sandwiches, shelf-stable options like hummus or mustard travel better than mayonnaise.
Wildlife Safety Reminder
Never feed wildlife or leave food scraps behind. Human food is harmful to Yosemite’s animals and attracts unwanted encounters. Pack out all wrappers and leftovers, and store food securely.
Other Gear & Equipment
A few additional items can significantly improve comfort and safety. These essentials are easy to overlook but play an important role once you’re on the trail.
Bug spray & sunscreen:
- Sunscreen is essential year-round, especially at higher elevations and near reflective granite and water. Bring enough to reapply as needed during the day.
- Bug spray is especially important in late spring and summer, when mosquitoes are most active. For best protection, apply it to exposed skin and lightly treat hats, boots, and backpacks.
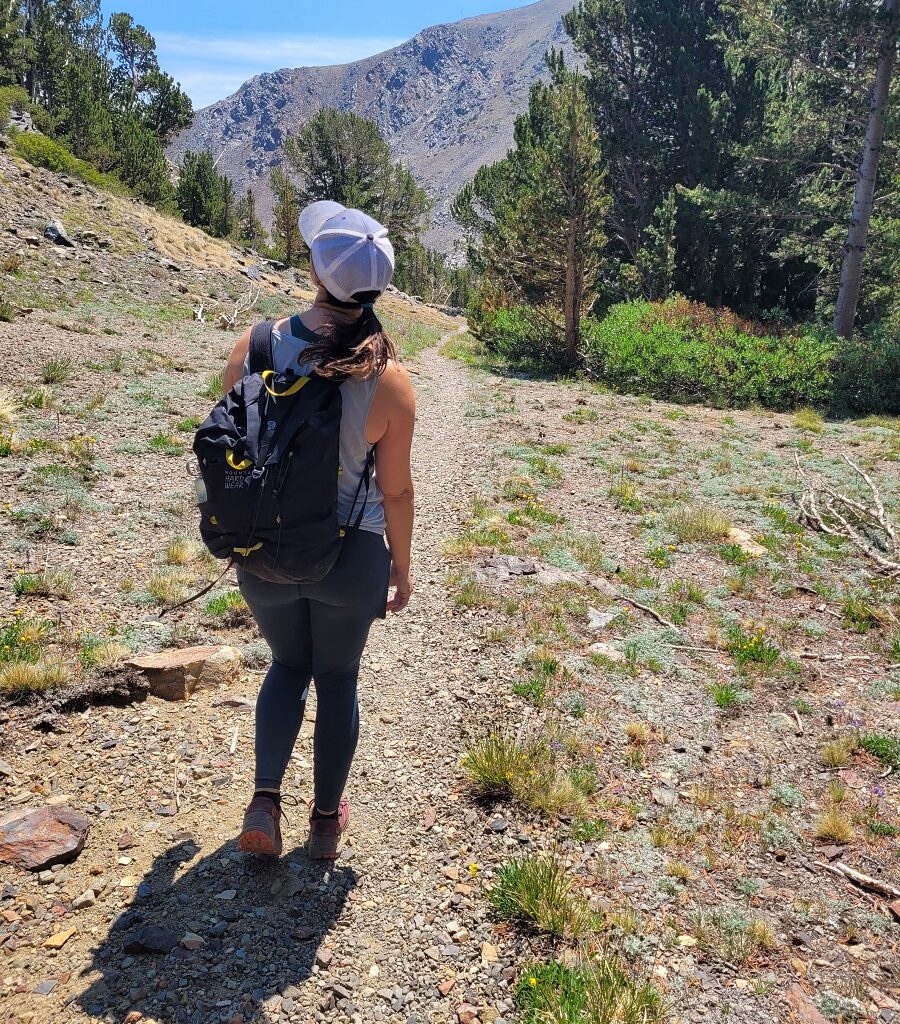
Backpack or Day Pack:
- Choose a pack that fits well and distributes weight evenly.
- Look for multiple compartments to keep essentials organized and accessible.
- Prioritize comfort over size—most day hikes require only a modest-capacity pack.
Navigation:
- Paper maps and trail guides are dependable on trails without cell service, and they show elevation changes that apps may not highlight.
- A compass is optional for short hikes but recommended for longer routes or less-traveled trails.
Quick Tip: Offline GPS maps are helpful but should never be your only navigation tool.
Must-Have Emergency & Safety Gear
Conditions can change quickly, even on well-traveled Yosemite trails. Packing basic emergency and safety gear helps you handle minor injuries, delays, or unexpected situations without turning a day hike into a serious problem.
First Aid Kit
Always have a compact first aid kit in your pack.
- Choose prepackaged kits that cover the basics and keep supplies organized
- Include bandages, blister care, and pain relief
- Make sure your kit includes a knife or multi-tool, which can be useful for gear repairs and emergencies
Headlamp
A headlamp is essential in case your hike takes longer than planned.
- Useful for early mornings, late returns, or shaded trails
- Keeps your hands free and adds a critical safety margin
Whistle or Signal Mirror
Simple signaling tools can make a big difference if you get separated or need help.
- A whistle carries farther than a voice and requires less energy
- A signal mirror can attract attention from long distances in open terrain
Bathroom Essentials (Leave No Trace)
Even though many trailheads have restrooms, you should always be prepared.
- Pack toilet paper, hand sanitizer, and a few sealable bags
- Seal used materials and trash in a Ziplock for proper disposal off the trail
- Follow Yosemite’s Leave No Trace rule: pack it in, pack it out
Optional Gear: Nice-to-Have Items
These items aren’t essential for every hike, but they can add comfort, convenience, or enjoyment depending on your plans. Consider them situational add-ons rather than must-haves.
- Trekking poles: Helpful on longer hikes, steep elevation gains, or descents where extra stability reduces knee and leg strain.
- Water shoes and swimsuit: Useful if you plan to stop and relax near rivers and streams on your hike.
- Camera or GoPro: Ideal for capturing the views at Yosemite’s most iconic photo spots.
- Binoculars: Great for birdwatching and spotting wildlife from a safe distance.
- Portable charger: Helpful for long days when using GPS, maps, or taking photos frequently.
- Climbing gloves: Only useful on trails with cables or exposed granite where hand protection improves grip.
Quick Tip: If an item doesn’t clearly support safety, comfort, or your specific plans for the day, it’s probably safe to leave it behind.
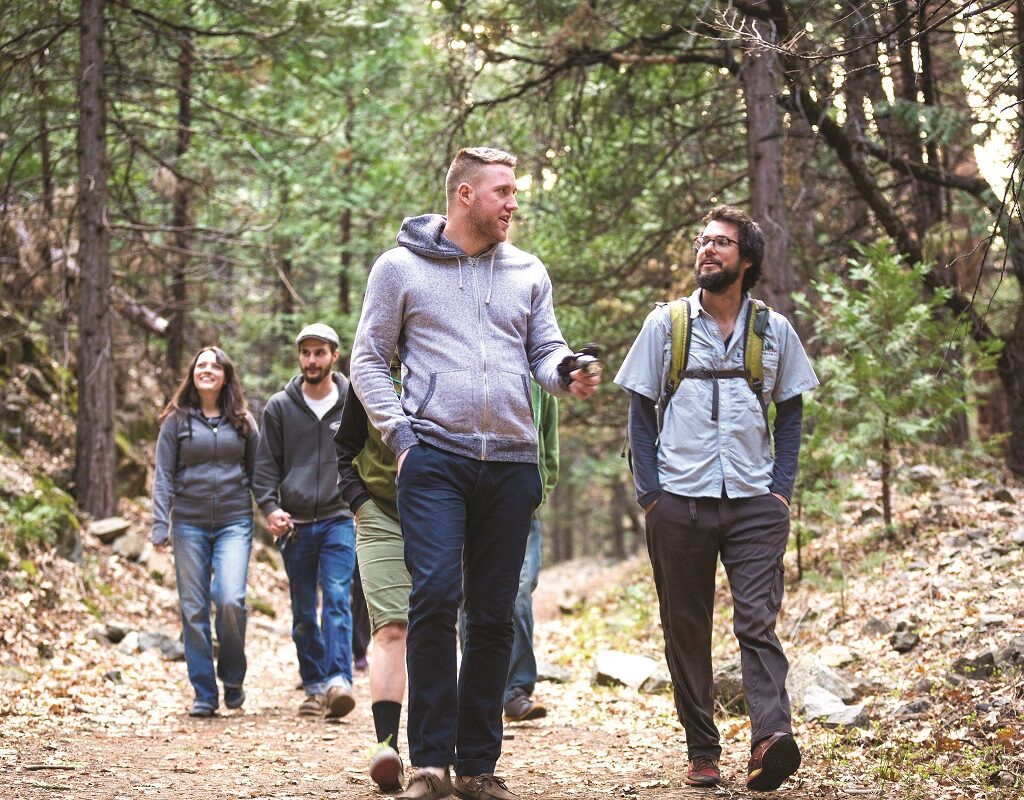
Clothing & Footwear: What to Wear Hiking in Yosemite
While Yosemite offers some of the best day hikes in the country, the trails vary widely in terrain, elevation, and weather, which makes choosing the right clothing and footwear essential. What you wear should support comfort, traction, and temperature control throughout the day. Start with the right shoes or boots, then build layers that adapt as conditions change.
Footwear: Hiking Shoes vs. Hiking Boots
Even if you don’t plan on hiking across any streams or rivers, it’s a good idea to invest in a reliable pair of waterproof hiking shoes or boots. Waterproof hiking shoes handle most trails from late spring through fall, while hiking boots become more important during spring runoff, early-season snow, and winter conditions.
Choose waterproof hiking shoes if:
- You’re hiking in early fall, mid-late spring, or summer
- Trails are well-marked and maintained
- Your hike is short to moderate in length
- You want lighter, more breathable footwear
Choose hiking boots if:
- You’re hiking in thick mud, snow, or cold weather
- Trails are icy, uneven, or rugged
- You’re hiking long distances or carrying more gear
- You want extra ankle support and insulation
Regardless of type, we recommend taking time to break in your hiking shoes or boots before your vacation. There’s nothing worse than new-shoe blisters on a hike. Bring moleskin bandages in your backpack to use if blisters start to form.
Also, don’t forget to pack and wear a pair of breathable socks. Ensure that your socks are long enough to protect your lower leg from your boots. It can also be helpful to pack an extra pair of socks. A fresh pair of dry socks can make a big difference on your hike back.
Clothing: Layers for Elevation & Weather
With the extreme elevation changes around Yosemite National Park, the temperatures can also drastically change from the start of your hike to the end of your hike and in between. No matter the time of year you visit Yosemite, layers will be important.
Base Layers
Your base layer sits closest to your skin and plays a major role in regulating body temperature. Choose lightweight, moisture-wicking fabrics, and avoid cotton, which holds moisture and can make you feel cold once you stop moving. Here’s what to wear hiking in Yosemite:
- In warmer months: A t-shirt or tank top paired with breathable hiking shorts or convertible pants works well.
- In cooler conditions: Opt for wool or synthetic long-sleeve tops that retain warmth even when damp.
Insulating Layers
Insulating layers help trap body heat when temperatures drop, especially at higher elevations or during early mornings and late afternoons. Pack layers like:
- A lightweight long-sleeve shirt for warmth and sun protection
- A fleece or wool mid-layer for spring, fall, or shoulder-season hikes
- Thicker insulation, warm socks, and gloves in late fall, early spring, or winter
Quick Tip: If you can’t comfortably hike while wearing and carrying your layers, you’re likely over- or under-packed. Aim for pieces that are lightweight, compressible, and easy to put on or remove as conditions change.
Shell or Rain Protection
A protective outer layer shields you from wind, rain, and waterfall spray. Even in summer, sudden afternoon showers can move through the Sierra Nevada, so rain protection is worth carrying year-round. Here’s what to bring:
- A lightweight water-resistant or waterproof jacket
- A compact poncho—it can cover both you and your backpack, and packs down small
Headwear: Head & Eye Protection
Sun exposure is a factor on Yosemite trails year-round, especially near waterfalls, granite surfaces, and open switchbacks.
- Sunglasses help reduce glare from the sun, water, and snow, and improve visibility as trails move between shade and open areas. They’re especially important in winter, when reflected sunlight can be intense.
- A hat provides essential scalp and face protection. A baseball cap, wide-brimmed sun hat, or lightweight bucket hat works well in warmer months. In colder conditions, switch to a beanie or wool cap for added warmth.
This small set of items goes a long way toward improving comfort on long or exposed hikes.
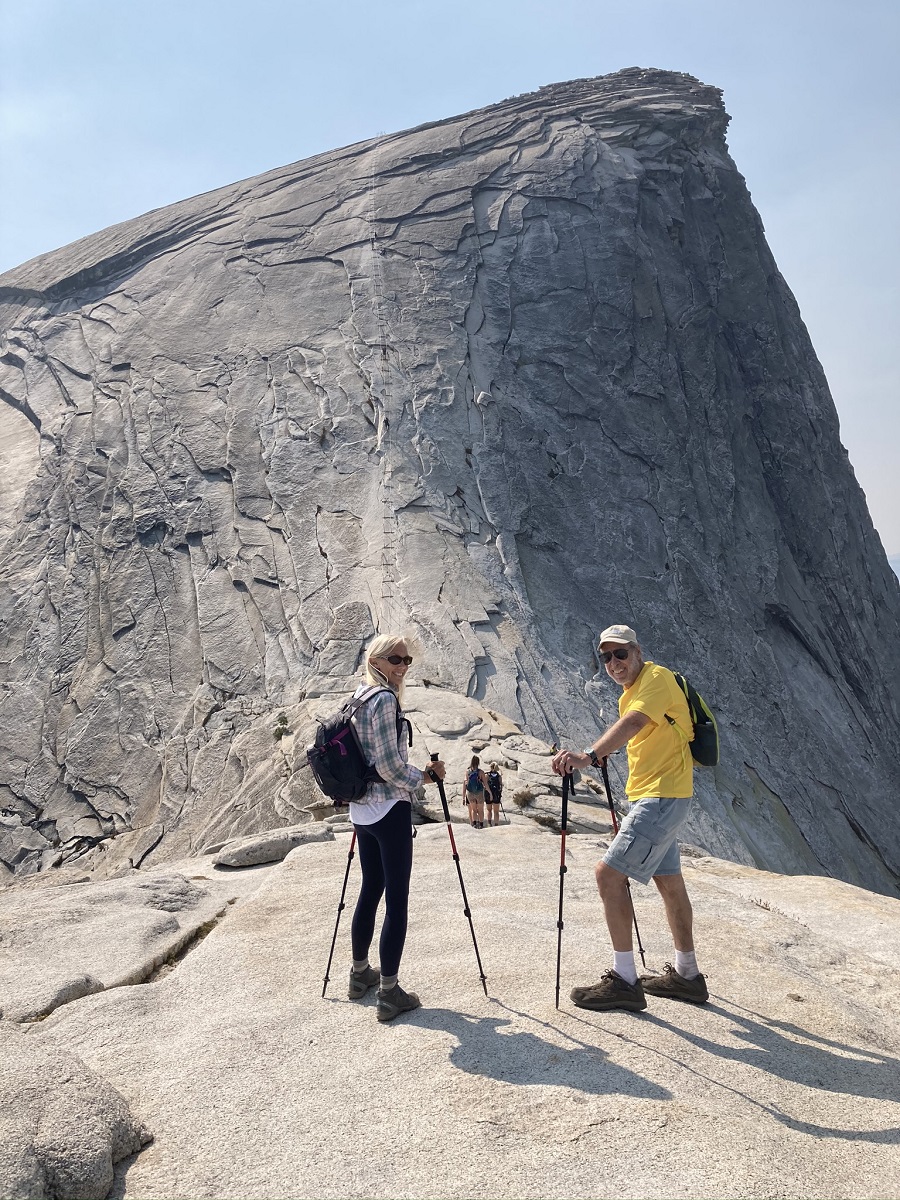
How to Prepare for a Day Hike in Yosemite
Preparing for a day hike starts with knowing where you’re going and what the conditions will be like. Whether you’re hiking with kids on one of the shorter, easier trails like the half-mile Lower Yosemite Falls Trail or tackling seven and a half miles to the top of Yosemite Falls, many of your hiking essentials will be the same.
However, there are some differences in the amount and type of gear you need based on the length of your hike and the season. Accounting for the length and intensity of your hike helps you know how much you need to pack, while preparing to hike based on seasonal conditions keeps you weather-ready from the parking lot to the trail’s end.
Hike Length: What Changes Based on Distance
- Short hikes (≤2 miles): Pack light with minimal food, but don’t forget to bring plenty of water.
- Moderate hikes (3–6 miles): Bring more water and snacks, layers you can adjust if conditions change, and offline navigation tools just in case.
- All-day hikes (6+ miles): Have a full food plan, emergency gear, and extra water. Consider bringing a headlamp if your all-day hike starts before dawn or ends after dusk.
Seasonal Packing Considerations
Conditions change depending on whether you’re visiting Yosemite in summer or winter, spring or fall. Here’s what you can expect based on each season:
- Spring: Prepare for runoff and mud with waterproof footwear.
- Summer: Heat, sun exposure, and bugs require extra water, loose clothing, skin protection, and bug spray.
- Fall: Temperature swings mean more layers so you can adapt based on elevation and time of day.
- Winter: Expect snowy conditions that require good insulation and quality, waterproof hiking boots to protect your feet from cold and wet weather.
What NOT to Bring on a Yosemite Day Hike
Packing smart also means knowing what not to bring. These items are unnecessary, unsafe, or not allowed on Yosemite trails.
- Bear spray: Prohibited in Yosemite National Park. Proper food storage and awareness are the recommended safety measures.
- Scented items left in cars: Items like food, toiletries, gum, and even wrappers can attract bears. Use bear lockers at trailheads and never leave scented items in your vehicle.
- Soap or detergents for water sources: Washing in streams, rivers, or lakes harms wildlife and water quality, even if products are labeled biodegradable.
- Excessive valuables: Expensive or irreplaceable items add risk and distraction without improving your hike.
- Unnecessary heavy gear: Overpacking increases fatigue and can make hikes less safe. Stick to gear that supports comfort, navigation, hydration, and emergencies.
Reminder: Yosemite is a protected wilderness, not a controlled environment. Following park rules keeps both visitors and wildlife safe.
FAQs: Yosemite Day Hike Packing Questions
Here are quick answers to some of the most frequently asked questions about day hiking in Yosemite:
Do you need hiking boots for Yosemite?
Not always. Waterproof hiking shoes work for most day hikes starting in late spring, while hiking boots are better for snow, mud, cold weather, or long, rugged hikes.
Do you need hiking shoes for Yosemite?
Yes. Hiking shoes or boots provide better traction, support, and comfort than casual footwear on Yosemite’s uneven and rocky trails.
Should you carry bear spray in Yosemite?
No. Bear spray is not allowed in Yosemite National Park and is unnecessary when proper food storage and wildlife awareness guidelines are followed.
Do I need water shoes for Yosemite?
Water shoes aren’t needed for hiking. They’re optional to bring and only useful if you’re planning to stop near lakes or streams.
What should I bring on a day hike in Yosemite?
Bring water, food, appropriate footwear, layers, sun protection, navigation tools, a backpack, and basic safety gear like a first aid kit and headlamp.
How do I prepare for a Yosemite hike?
Check trail conditions, choose gear based on the season and hike length, pack essentials first, and review official Yosemite National Park safety guidance before heading out.
Final Yosemite Hiking Tips
A little preparation goes a long way when hiking in Yosemite. These final tips help you stay informed, safe, and respectful of the park’s natural environment.
- Check with park rangers before heading out to confirm current trail conditions, closures, and weather impacts. Conditions can change quickly, especially during spring runoff or after storms.
- Pay close attention to safety signage along trails. Warnings about steep drop-offs, slick granite, or fast-moving water are there for a reason.
- Use extra caution if hiking solo. Leave your route and expected return time with your lodging front desk, a friend, or a family member.
- Treat Yosemite as a true wilderness area. Stay aware of your surroundings, as hazards can exist even on popular routes.
With the right preparation, a Yosemite day hike can be one of the most rewarding parts of your trip. From short and scenic waterfall walks to longer elevation gains, smart packing helps you stay comfortable, safe, and fully immersed in the experience.
For a convenient home base, Yosemite Hotels offers lodging just outside the park. Guests have access to on-site general stores for last-minute supplies, guided tours led by local experts, and Recreation Desks that can help with trail planning and day-use rentals. Learn more about staying at Evergreen Lodge, Rush Creek Lodge, or Firefall Ranch and get your packing list ready for your Yosemite hiking adventure.